Related Posts:
Related Posts:

When I initially saw this video of a photographer’s near miss with lightning I was absolutely shocked.
Admittedly it resulted in a spectacular photo and fortunately everyone was okay on this occasion but I would seriously have to think twice before choosing to stand quite so close to the action in future.
Video of the moment this was taken can be viewed below:
This is one incredibly fortunate photographer. Wow.
Be safe!
Related Posts:
I came across a blog belonging to Ryan Bradford who currently works as a mailman in San Diego. He currently has a wonderful (not to mention rather amusing, from the viewer’s perspective at least) post on his blog entitled All the Dogs Want to Kill Me and as the title suggests it consists of a series of pictures of his various canine adversaries while doing his rounds.
The pictures were all shot using a disposable 400 ISO, 35mm film camera.


All images © Ryan Bradford
You can see all of these photos and more in full size photos over on Ryan’s blog post here.
Happy shooting!
Related Posts:
Twitter always seems to be on top of the latest news stories and has made a number of internet celebrities along the way. Most notably perhaps Janis Krums’ photo of the U.S. plane that crash landed in New York’s Hudson River in January 2009.
Yesterday another internet celebrity was born as Nasa launched the space shuttle Endeavour for the very last time and Stefanie Gordon happened to be descending on her flight from New York to Palm Beach. Using her iPhone she was able to catch the following shot which subsequently went viral:

Image © Stefanie Gordon
Mashable have the full story but here is a brief extract:
When Stefanie Gordon boarded her plane in New York City to visit her parents in Palm Beach, the captain noted there was a chance passengers would witness the space shuttle Endeavour’s last launch during the flight. But she never expected to play a role in documenting it.
As the plane descended toward Palm Beach and the Endeavour’s launch became visible, Gordon pulled out her iPhone and snapped a few photos and a short video. On the ground, she posted one of the photos to her then 1,800 Twitter followers.
In a few hours, she was fielding phone calls from ABC, the BBC and CNBC. She had accumulated about 1,000 new Twitter followers, and she had to turn the @mention push notifications off on her phone so they wouldn’t drain the battery.
from: mashable.com/2011/05/16/endeavour-launch-twitpic/
What an incredible shot and it just goes to show the possibilities that are offered by combining a smartphone with social media and a spot of good fortune!
Happy shooting!
Related Posts:
A couple of months ago I wrote a blog post about the recently discovered but sadly deceased street photographer Vivian Maier (1926-2009). Vivian Maier spent most of her life working as a nanny but spent almost 40 years beginning in the 1950s photographing Chicago during her free time. Her huge body of work was never displayed and was unknown until being discovered after her death. You can read a little more about her here.
Well it turns out that another wonderful street photographer has recently been discovered after his death and from what we know so far this is an equally fascinating story. According to the information available on The Perfect Exposure Gallery website (who are currently exhibiting some of the work) Frank Oscar Larson (1896-1964) lived and worked in Queens NTC in the 1950s and was passionate about street photography. Like Vivian Maier he spent much of his free time wandering around the city with his Rolleiflex camera taking shots of anything that caught his eye, visiting locations such as Chinatown, Hell’s Kitchen, Times Square & Central Park. Frank developed and printed his own film but much of the work was never seen by anyone other than him. Sadly Larson died in 1968 and his work would remain undiscovered until a box of negatives would be discovered some 45 years later.
I have to say that I find this work absolutely fascinating. There is something incredibly compelling about images taken from a completely different era, especially candid shots like this rather than the iconic celebrity and landscape shots we are more used to seeing.
Here are a few examples of his work (more of the work can be seen by following the links below):


All images © Frank Oscar Larson
An exhibition entitled “Reflections of New York” featuring the work of Frank Oscar Larson has just ended at the Perfect Exposure Gallery in LA. The information is still available on the gallery website as well as lots more examples of his work. I would urge you to take a look while it is still available.
Frank Oscar Larson’s website
http://www.franklarsonphotos.com/
Information about the “Reflections of New York” exhibition
http://www.theperfectexposuregallery.com/
Examples of Frank Oscar Larson’s work
http://www.theperfectexposuregallery.com/admin/guide.php?proj=12
Happy shooting!
Related Posts:
On Tuesday 10th May 82 year old veteran photographer Elliot Erwitt is due to receive the Infinity Award for Lifetime Achievement from the International Center of Photography.
They will be exhibiting some of his favourite pictures later in the month and to mark the ocassion his son Misha Erwitt carried out an interview with him which can now be read on the NYTime Lens blog right now along with a selecion of Elliott Erwitt’s iconic shots.


All images © Elliott Erwitt/Magnum Photos
Take a look at the article on the the NYTimes Lens blog for the full interview and gallery.
Happy shooting!
Related Posts:
A very quick post to say that Sunday May 8th is Mother’s Day in the States (it was back in March for those of us living in the UK) and Slate Magazine have published a bunch of photos of mothers to celebrate the day.
I really enjoyed viewing them and thought that you might just enjoy them too. I particularly enjoyed the images below:

© Elliott Erwitt / Magnum Photos

© Alex Majoli / Magnum Photos
You can view the full gallery of 26 images on Slate Magazine on the following URL: todayspictures.slate.com/20110506.
Happy Mother’s day and of course, happy shooting!
Related Posts:
I came across this YouTube video by Gavin Hoey recently and thought it might be useful for anyone who has ever struggled to get their fold-up reflector back into the tiny carry case (I certainly know I have in the past):
Easy when you know how.
Happy shooting!
Related Posts:
I recently decided that it might be fun to make a pinhole camera, as a little experiment. Having never made one before I decided that I would make a matchbox pinhole camera, as described on the following site:
http://www.matchboxpinhole.com/
So I carefully assembled the various pieces, which were all very inexpensive, in-fact the most expensive item was the roll of 35mm film, which was £4.99.
The items I needed were as follows:
* A matchbox;
* Roll of 35mm film;
* An empty roll of 35mm film with at least 1cm of film sticking out;
* Some thin cardboard;
* Empty can of coke;
* Black electrical tape;
* A plastic spiral binder;
* A thin sewing needle/pin;
* Scissors;
* Craft knife;
* Black marker pen;

Pinhole camera ingredients
I would estimate that following the very simple instructions available on http://www.matchboxpinhole.com/ it only took me about 30 minutes or so to assemble (in my mind’s eye I resembled MacGyver, creating something incredible from next to nothing). It was all very painless and in no time at all I had created my very own, tiny, pinhole camera.

Pinhole camera complete

Matchbox Pinhole Camera
Now armed with my newly assembled camera I was keen to take some photos, but sadly by this point it was getting rather late in the day and perhaps more importantly, rather dark. So I reluctantly decided that I would have to wait until the following day before capturing my prize winning shots!
Sadly the world had other plans for me and for the next two days I didn’t get an opportunity to get out and about with my camera during daylight hours. So I decided that on the weekend I would be out with my pinhole camera come wind, rain or shine.
As it turned out the weekend was absolutely lovely, so I set off with my DSLR camera and my pinhole camera in an effort to find something worthy of the use my 35mm film. Shooting on film is something I haven’t done for a long time and it was a rather unique feeling to actually have to stop and consider the 24 shots I had available. As I typically shoot digital I am free from the shackles of film, but in a way, knowing that you only have a finite number of shots and that the moments would perhaps have to be picked somewhat more carefully than normal was actually quite refreshing.
I had read the instructions on the matchboxpinhole.com website and understood that exposure when outside should be somewhere between 1-2 seconds and that it was best to take at least three shots of each subject at varying exposure lengths, in an effort to try and ensure a useable shot. As it turns out, this is extremely good advice!
So with the above information in mind, taking three shots for each subject would leave me with approximately eight actual shots to take. I headed to the beach and set about taking a number of shots, at one point I felt sure I had broken the camera but I continued on anyway, just in case. Another problem was that I was using a ring pull to wind the film into the empty canister and after only a couple of photos the plastic lugs started to break, which made the winding rather difficult. I persevered and after taking a few shots at the beach I headed to the forest to capture a few final photographs.
Once I had finished the roll of film I wound the film back into the correct film canister and looked forward to seeing how my shots would turn out. This was Saturday evening, so I would now have to wait until Monday at the very earliest before I could get my film developed. I did consider developing the film myself, but decided that by the time I had bought all of the chemicals I would have spent a reasonable amount of money and would still have to wait for the items to arrive by post. I decided I would get this film developed and look to process the next film myself.
On Monday morning I took the film to a local one hour processing facility, making sure to let the person behind the counter know than the film was shot on a pinhole and that the spacing of the shots may be irregular. She was very helpful and told me she would be super careful. I now had to wait patiently for an hour in order to see how good (or more likely, rubbish) my photos were going to be. One of the problems with the basic pinhole I had created was that it did not have a viewfinder, so it was rather difficult to work with composition. It was really just a case of pointing it in roughly the direction I wanted to capture and hoping for the best. My next pinhole camera will certainly need to have a viewfinder built into it!
Well one hour later I got my shots and feverishly unwrapped them to discover that they were in fact… rather terrible. They were mostly overexposed and the composition was not great. One of the biggest problems for me was judging the distance I needed to be from my subject. It turns out that I need to be much closer to the subject than I had imagined and I also needed to expose the shot for closer to a second and no longer. Well, it’s fair to say I was disappointed with my shots but I won’t be deterred. I’m going to make another pinhole camera, but this one will be more sophisticated (i.e. with a viewfinder) and being armed with the experience of the first camera I may even get a half decent shot!
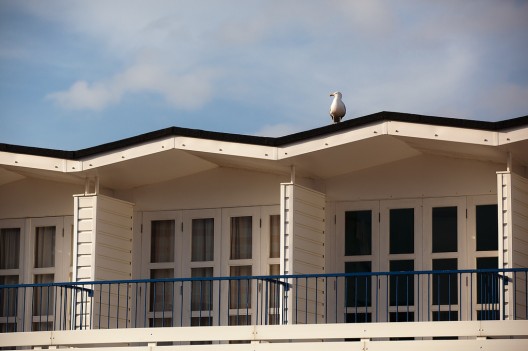
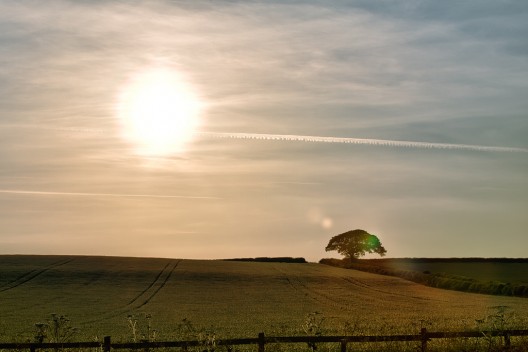
Oh and here are a couple of the shots from my first pinhole camera attempt.


Making a pinhole camera is cheap, very easy and lots of fun. It can make you think about your photography in new ways, especially if you are used to shooting with digital. It’s well worth having a go and who knows, unlike me, you may even get some great shots on your first attempt!
Happy shooting!